How to supply print-ready artwork
A few checks before you upload can make all the difference to your finished print. Start with a PDF, then check the size, bleed and image quality.
Your artwork checklist
- Supply a high-resolution PDF at the size you ordered.
- Add 3mm bleed on every side and crop marks outside it.
- Keep text and logos at least 5mm inside the cut edge.
- Use original images at 300dpi at their final print size.
- Set artwork to CMYK and embed your fonts.
- Supply single pages, not spreads or imposed sheets.
Know More
Bleed is extra artwork that will be cut away. It prevents thin white edges if the cut moves slightly. Extend any background colour or photo 3mm beyond every side of the finished page. Do not leave the bleed blank.
Finished size: 148 × 210mm
Artwork including bleed: 154 × 216mm
Crop marks sit outside this area.
Crop marks are short lines outside the artwork that show the finished edge. Add them using your PDF export settings, with an offset that keeps them outside the 3mm bleed. Do not draw a border around the page instead.
Keep names, logos and other important details at least 5mm inside the finished edge. Bleed goes outside the cut; the safety margin stays inside it. Binding, folds and special shapes may need more space, so follow the product template where one is supplied.
Thin borders close to the edge can end up uneven or partly cut off. Avoid them where possible. If the design needs a border, leave plenty of space inside the trim edge.
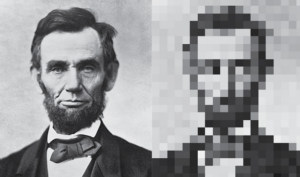
For standard print, use images at 300dpi at the size they will appear on the page. A screenshot or a photo saved from social media may look fine on your phone but print poorly. Enlarging a small image will not restore lost detail.
The file to upload: PDF
Your design stays together in one print file.
Export a high-resolution PDF with bleed, crop marks and embedded fonts. Supply one page for each printed side, in the correct order. If you create your artwork in Word or PowerPoint, export it as a PDF and check the result before uploading. Editable documents can change appearance on another computer, especially if fonts are missing.
High-resolution JPEG and TIFF files can also be used for suitable artwork, but a print-ready PDF is the preferred format. If we need to edit your design, supply the original AI, PSD or packaged InDesign files as well as a reference PDF.
In Canva, download as PDF Print and tick Crop marks and bleed. Make sure backgrounds extend into the bleed area. If CMYK is available in your export settings, use it. Check the exported PDF rather than relying on the editor view.
A Word document is not automatically print-ready just because it has been saved as a PDF. Check the finished size and whether the design needs bleed. If you cannot add bleed or crop marks, ask us before ordering rather than guessing.
Use CMYK for print artwork. RGB files may change colour when converted for printing. Screens are not a precise colour proof, so tell us before ordering if a particular brand colour is important.
Open your final PDF and check every page: spelling, contact details, page order, image quality and finished size. Make sure no text has moved or disappeared. Check your proof carefully before approving it for print.
FAQs
Extra artwork beyond the cut edge. Add 3mm on every side.
Yes. Include them when exporting your PDF, outside the bleed.
A high-resolution, print-ready PDF is best.
Export a PDF first. In Canva choose PDF Print, with crop marks and bleed.
It may be too small for the print size. Use the original image at 300dpi.
Not exactly. Screens use RGB light; printing uses CMYK inks.
Not sure your file is ready?
Ask us before ordering. We can help you check the artwork and choose the right next step.