Submitting Artwork
PDF Files
We request that all artwork is supplied as a high resolution (300dpi) PDF. It is imperative that you create your PDF in the correct way. For commercial printing, please use the following settings;
- Resolution – High
- Compression – Downsampled to 300dpi setting “auto compression” to high
- Font Embedding – Choose “embed all fonts” or ensure all fonts are outlined.
Set colour to CMYK and not RGB (all RGB artworks will be converted to CMYK and this may alter your colours).
Photoshop
Set Resolution to 300dpi when creating your new document. Save the file format to TIFF or JPEG.
Please note: If you require us to make changes to your artwork, we will require that you send us new source files in one of the following file formats; PSD, INDD or AI. We are not able to alter changes to flattened images such as JPEG or TIFF.
Illustrator
Embed all images and outline all fonts to curves. Save as an EPS/PDF file.
Indesign
Please make sure that all fonts and images used in your Indesign document are supplied to us in a zipped folder using the “package” function in Indesign located under the “file” menu. After packaging, compress the document using Stuffit or WinZip before uploading or emailing.
Please include a PDF with all Indesign files and folders. We use this as a reference to make sure that all is in order and that nothing is missing, dropped or has moved on the artwork supplied. Please note that this must then be proofed and passed first and may cause a longer lead time for delivery.
Trimming & Cutting
We require crop marks on all supplied artwork.
Artwork Bleed
It is essential that there is a minimum 3mm bleed around your artwork. We require 3mm bleed for cutting purposes and to allow your image/artwork to bleed off the edge of the paper/card. For example: A5 size is 148mm x 210mm. A5 with bleed of 3mm is 154mm x 216mm. For more information on bleed, click here. Please note that there is a 2mm tolerance for cutting on all jobs.
Imposition
Please ensure that you do not supply your files imposed or as “printers pairs”. Please only send one version, one up, actual size.
Microsoft Documents
We cannot accept the following formats for printing:
- Word
- Excel
- Powerpoint
- Publisher
See below for a link to a site that will convert any of the above files to a useable PDF. It’s easy, quick and free.
https://www.zamzar.com/
Please include a screen shot of your Microsoft document before you convert it to PDF. To take a screenshot, see below…
- PC – Click on the “PRINT SCREEN” button on the keyboard and paste.
- MAC – Press the “Apple” key and the “Shift” key and the number “4” key, then simply highlight the area you wish to screenshot.This saves a PNG copy to your desktop.
Wire Bound Booklets
Allow a 10mm margin on the side of the artwork that will be bound. If you do not, some of the artwork may be cut off or obscured by the wire binding.
Proof Reading
Remember the old carpentry adage… “Measure twice, cut once?”
Well in the print game we live by “Proof twice, print once.”
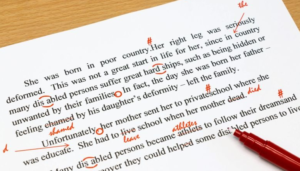
Proofing your artwork is essential and is 100% the responsibility of you, the customer. Whether you supply us with your own artwork files or we generate them for you, it is incumbent on you to thoroughly read, spell check and cross reference all important details, words and numbers.
If you would prefer to have your artwork proofed by a member of our specialist team, this service can be requested for an additional fee. Please contact us for more details about this service.
Remember a proof of your print file is given to you to ensure that all is accurate and correct before we go to print. You, the customer, are responsible for ensuring there are no errors or omissions. Only you know your business and product best so you are best placed to check everything. Remember, once it’s printed it’s too late, so check, check, check.
Once you agree to the Proof Approval function on the site, or email us to tell us that you are happy to proceed to print, you are then responsible for any errors or omissions found thereafter. More information on proofing can be found in our terms and conditions.
Need Help?
If you still have queries or questions please do not hesitate to call our design team on (01) 858 1000 and we will be sure to help.
How to achieve the perfect artwork file
THE PRINT READY CHECKLIST
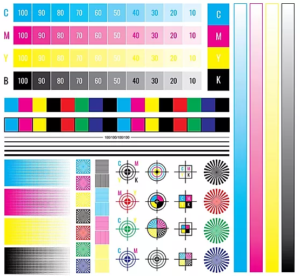
There are several things you need to bear in mind when creating artwork. So we’ve put together some tips that will help you produce the perfect artwork file. We explain the aspects of colour, size, format, line thickness, margins and the right resolution for your image files. Now there’s nothing stopping you from producing perfect artwork files!
Document colours
- Prepare your files using CMYK as the colour mode, not RGB.
- When using special colours (Pantone or HKS), enter the desired values in the colour channel.
- Instructions for special colours: To avoid mottled or patchy colours, areas with another process colour (CMYK) overlaying a special colour should be created using knockout rather than overprinting. Likewise, special colours over a CMYK colour should be knocked out.
- If you order a greyscale item, the file needs to be created in greyscale.
- We recommend creating grey areas in shades of black to ensure a perfect print result.
Files in original size
- Create your files in their final trim size.
- If possible your files will be automatically scaled to fit the order format (without bleed). Please note that scaling a smaller format to a larger one can lead to a decrease in resolution quality. For example, scaling an A6 flyer up to an A4 flyer can affect the quality of your final product. The lack of bleed on the outer edges can likewise lead to white edges around your product.
The right trim allowances/bleed
- To allow leeway for cutting differences in production, always add trim allowance to the size ordered:
- Standard trim allowance: 3 mm
- Envelopes: 2 mm
- Textile stretcher frames: 15 mm.
- Do not use borders to frame the whole page. They can be partially cut, due to the mechanical cutting tolerance and can effect the appearance of the final product.
Safety margin
- Keep all contents at least 5 mm away from the edge of the finished size.
- Contents in spiral bound calendars or brochures should be kept at least 20 mm away from the binding edge.
- For folders, please leave a safety margin of at least 5 mm from the fold.
- Make sure colours, background pictures and layouts extend into the bleed area so as to avoid leaving white lines as a result of cutting tolerances.
Page numbers for brochures
- For templates with multiple pages, create the individual pages in sequential order, starting with page 1 (front page) through to the last page (back page).
- Check that all superfluous pages have been deleted.
Images and graphic resolutions
- Pictures, images and graphics: 300 dpi
- Greyscales and colour images: 300 dpi
- Line artwork (e.g. texts in a small font size and drawings): 1.200 dpi
- Ad posters, advertising technology with text: 150 dpi
Line weights
- Lines should be at least 0.15 pt.
- Lines that are too thin are automatically increased to a printable weight. (Exception: lines set to precisely 0 pt. We cannot guarantee that the weight of these lines will be automatically increased.)
- Do not use borders to frame the whole page. They can be partially cut, due to the mechanical cutting tolerance and can effect the appearance of the final product.
File formats
- Always save your files in print-ready, un-editable formats, preferably PDF (PDF/X-4 or PDF 1.6), JPG, TIFF, EPS.
- Avoid using multiple layers (Optional Content) in your PDF files. Retain native transparencies to avoid colour space conversion.
Embedded fonts or paths
- Convert fonts to paths or embed them to avoid typeface discrepancies. Use fonts that don’t have any licence restrictions and make sure the font coding in the PDF file is correct.
- Make sure there is sufficient contrast between background and font colours.
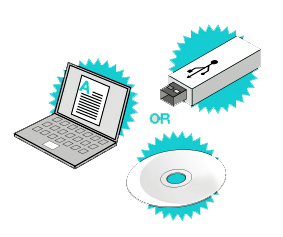
Creating artwork for print can be confusing. So we have created a simple checklist that will assist you when creating your custom artwork. We explain various aspects of printing such as image resolution, color, file-format, paper size, stroke, edge margins and document size. We have tried to simplify it as much as possible but should you have any further queries, please do not hesitate to get in touch.
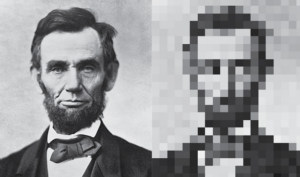
Image Resolution
- Set your resolution to a minimum of 300 dpi for best results.
- Try where possible to source the original image file avoid using shared social media files. When a file is shared through social media, the resolution is compressed down to 72 dpi. This looks fine on your phone but does not print very well as an A1 poster for example.
- As a rule of thumb, the bigger the resolution, the higher the data, the better the print.
- Where possible, set your artwork size to the actual output size with a resolution of 300 dpi. For example, if you want an A4 poster, set the physical file dimensions to 210mm x 297mm with a resolution of 300 dpi.
- Scaling up files that are smaller than the output size can result in poorer print quality; for example, scaling an A5 file to an A3 file will be poorer in quality and clarity.
- Social media files and images from apps such as What’sApp and Facebook are usually highly compressed and are typically not suitable for printing high quality results, so where possible, use the original photo that was taken on the phone or camera.
Colour
- When supplying artwork to us, please ensure that the colour mode of your file is set to CMYK and not RGB colour. (RGB is primarily used for images and files used on screens and web).
- If you wish your artwork to be printed in greyscale, set your colour mode to greyscale for better results.
- For black text it is best practice to use 100% black rather than black that is comprised of CMYK.
- Pantone colours or Spot Colours such as Silver and Gold Metallic’s are not achieved through digital CMYK printing, if you require a spot or pantone colour on your artwork please contact us and we can discuss the file specifications and provide you a bespoke quotation. If you decide to use artwork that includes a gold metallic spot colour for example using CMYK digital printing the gold colour will not have a lustre or shimmer effect, it will appear as a deep yellow or ochre colour and accuracy cannot be guaranteed. Preferably convert these spot colours to CMYK in your artwork prior to exporting the PDF for printing.
File-Format
- Please supply all artwork preferably as print ready PDFs which have been exported using a high-resolution setting.
- Other suitable formats that can be used for printing are JPEG, EPS or TIFF, once the resolution is of high quality such as 300dpi. A low dpi such as 72 will result in poorer quality.
